An achilles heel (or two) for the great and powerful Storyboard
Since Xcode 4.2, we have had storyboards. And while many developers saw them as a nuisance at first, storyboards have become more and more important with the advent of new phone sizes. And they are pretty great. We can get a view into our entire app and how its various views connect up with one another, a sense of the “flow” our users will experience. We can build a rough estimate of how each view will look, and share that with designers. In more recent versions of xcode, we can even review our UI on the different size screens.
However, even with all of this functionality, there are two major drawbacks to using storyboards:
1) Version control conflicts
Xibs are effectively stored as xml. And when two programmers are working on parts of a storyboard at the same time on their own systems and then want commit their code up to a central repository, one of them is going to have to integrate the other’s work into their version first. And storyboards do not make that easy.
It becomes a rather involved exercise of examinining the xml for the conflicts and then knowing which are the moving parts you wish to keep / discard (without being able to see the storyboard until you have made ALL changes.) This is pretty much unacceptable. While a programmer who has a strong eye for XML may be able to piece it all together with some efficiency, for most of us it will eat away at the cost / benefit of using storyboards to begin with.
2) Machine performance for large models
To a lesser extent, as Storyboards become large, they tend to act a bit funky / freeze up. Ask many developers who have 16GB RAM in their machine, and a new MacBook Pro laptop with strong CPU and they still may run into issues. (Take this as anecdotal and not necessarily what you will experience, but may still be good to pre-empt a potentially knotty situation!)
To the rescue: Xibs
The xib was a popular GUI element prior to the advent of storyboards and continues to have strong support, namely because it supports much of the upside of Storyboards without the level of version control conflicts and processor issues you may encounter on some machines. To be clear, you wouldn’t see the same level of version control conflicts because generally speaking, developers do not work on the same view at the same time (and xibs, as you will soon see, usually represent just a single view.)
So what is a xib?
A xib is a drag-and-drop GUI for a UIView. It is one type of “Interface Builder” or “IB” file you can build in Xcode. You can add UILabels, UITextViews, UIButtons, subviews, custom views, and pretty much any object that inherits from UIView, to it.
Part I: Xibs with storyboards
This tutorial will describe how to setup a xib with an existing storyboard. In a future tutorial, we will demonstrate how to setup a xib without a storyboard. And in a later post we will go over how to segue from one view to another in code, to ensure you are completely setup with the tools necessary to use xibs.
Getting setup
To add a xib file to your project in Xcode 6, go to File –> New –> File.

Click on User Interface from the choices on the left, and then choose View (or Empty) on the right.
Click next.
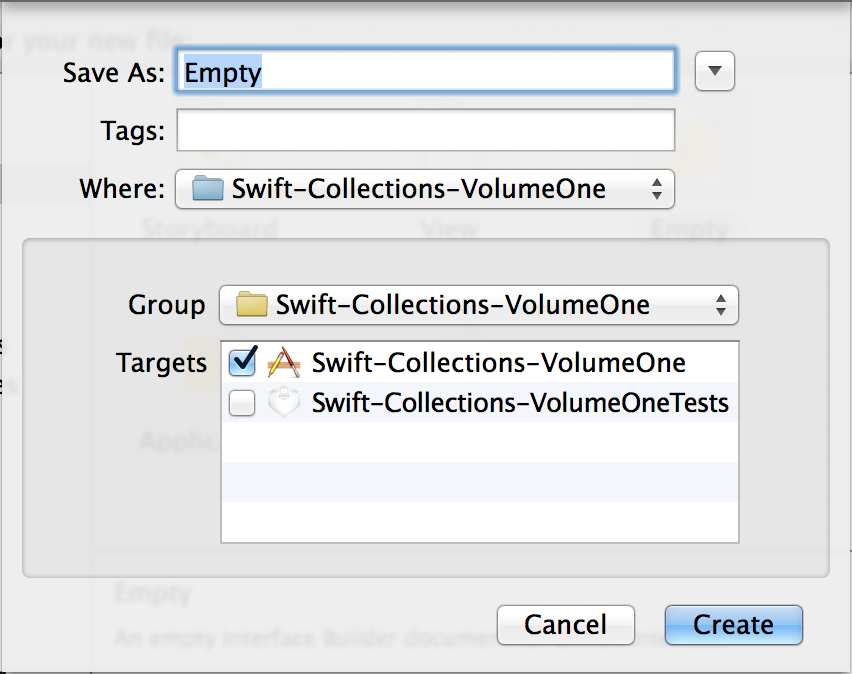
You will be prompted to save the file with a name. It is customary to save it with the name of the UIView class to which you will be associating this IB file.
Just as you would with a storyboard, you can drag objects from the Object Library onto the canvas. I suggest beginning with a View because most xibs you build do need
Now here is the meat of it. Most folks (and blog posts) seem to either miss this part, or just not get it quite right. This is what you need to do:
Build out the xib
Add a single view at a custom size of 160 points by 80 points (or resize your view if you already have it on screen.) You could have a view that is full size, but then it will be tougher to see how these can be reused on a storyboard as we will demonstrate. Then dragged a UILabel onto the UIView and center it. Add some text to it like we have done here.
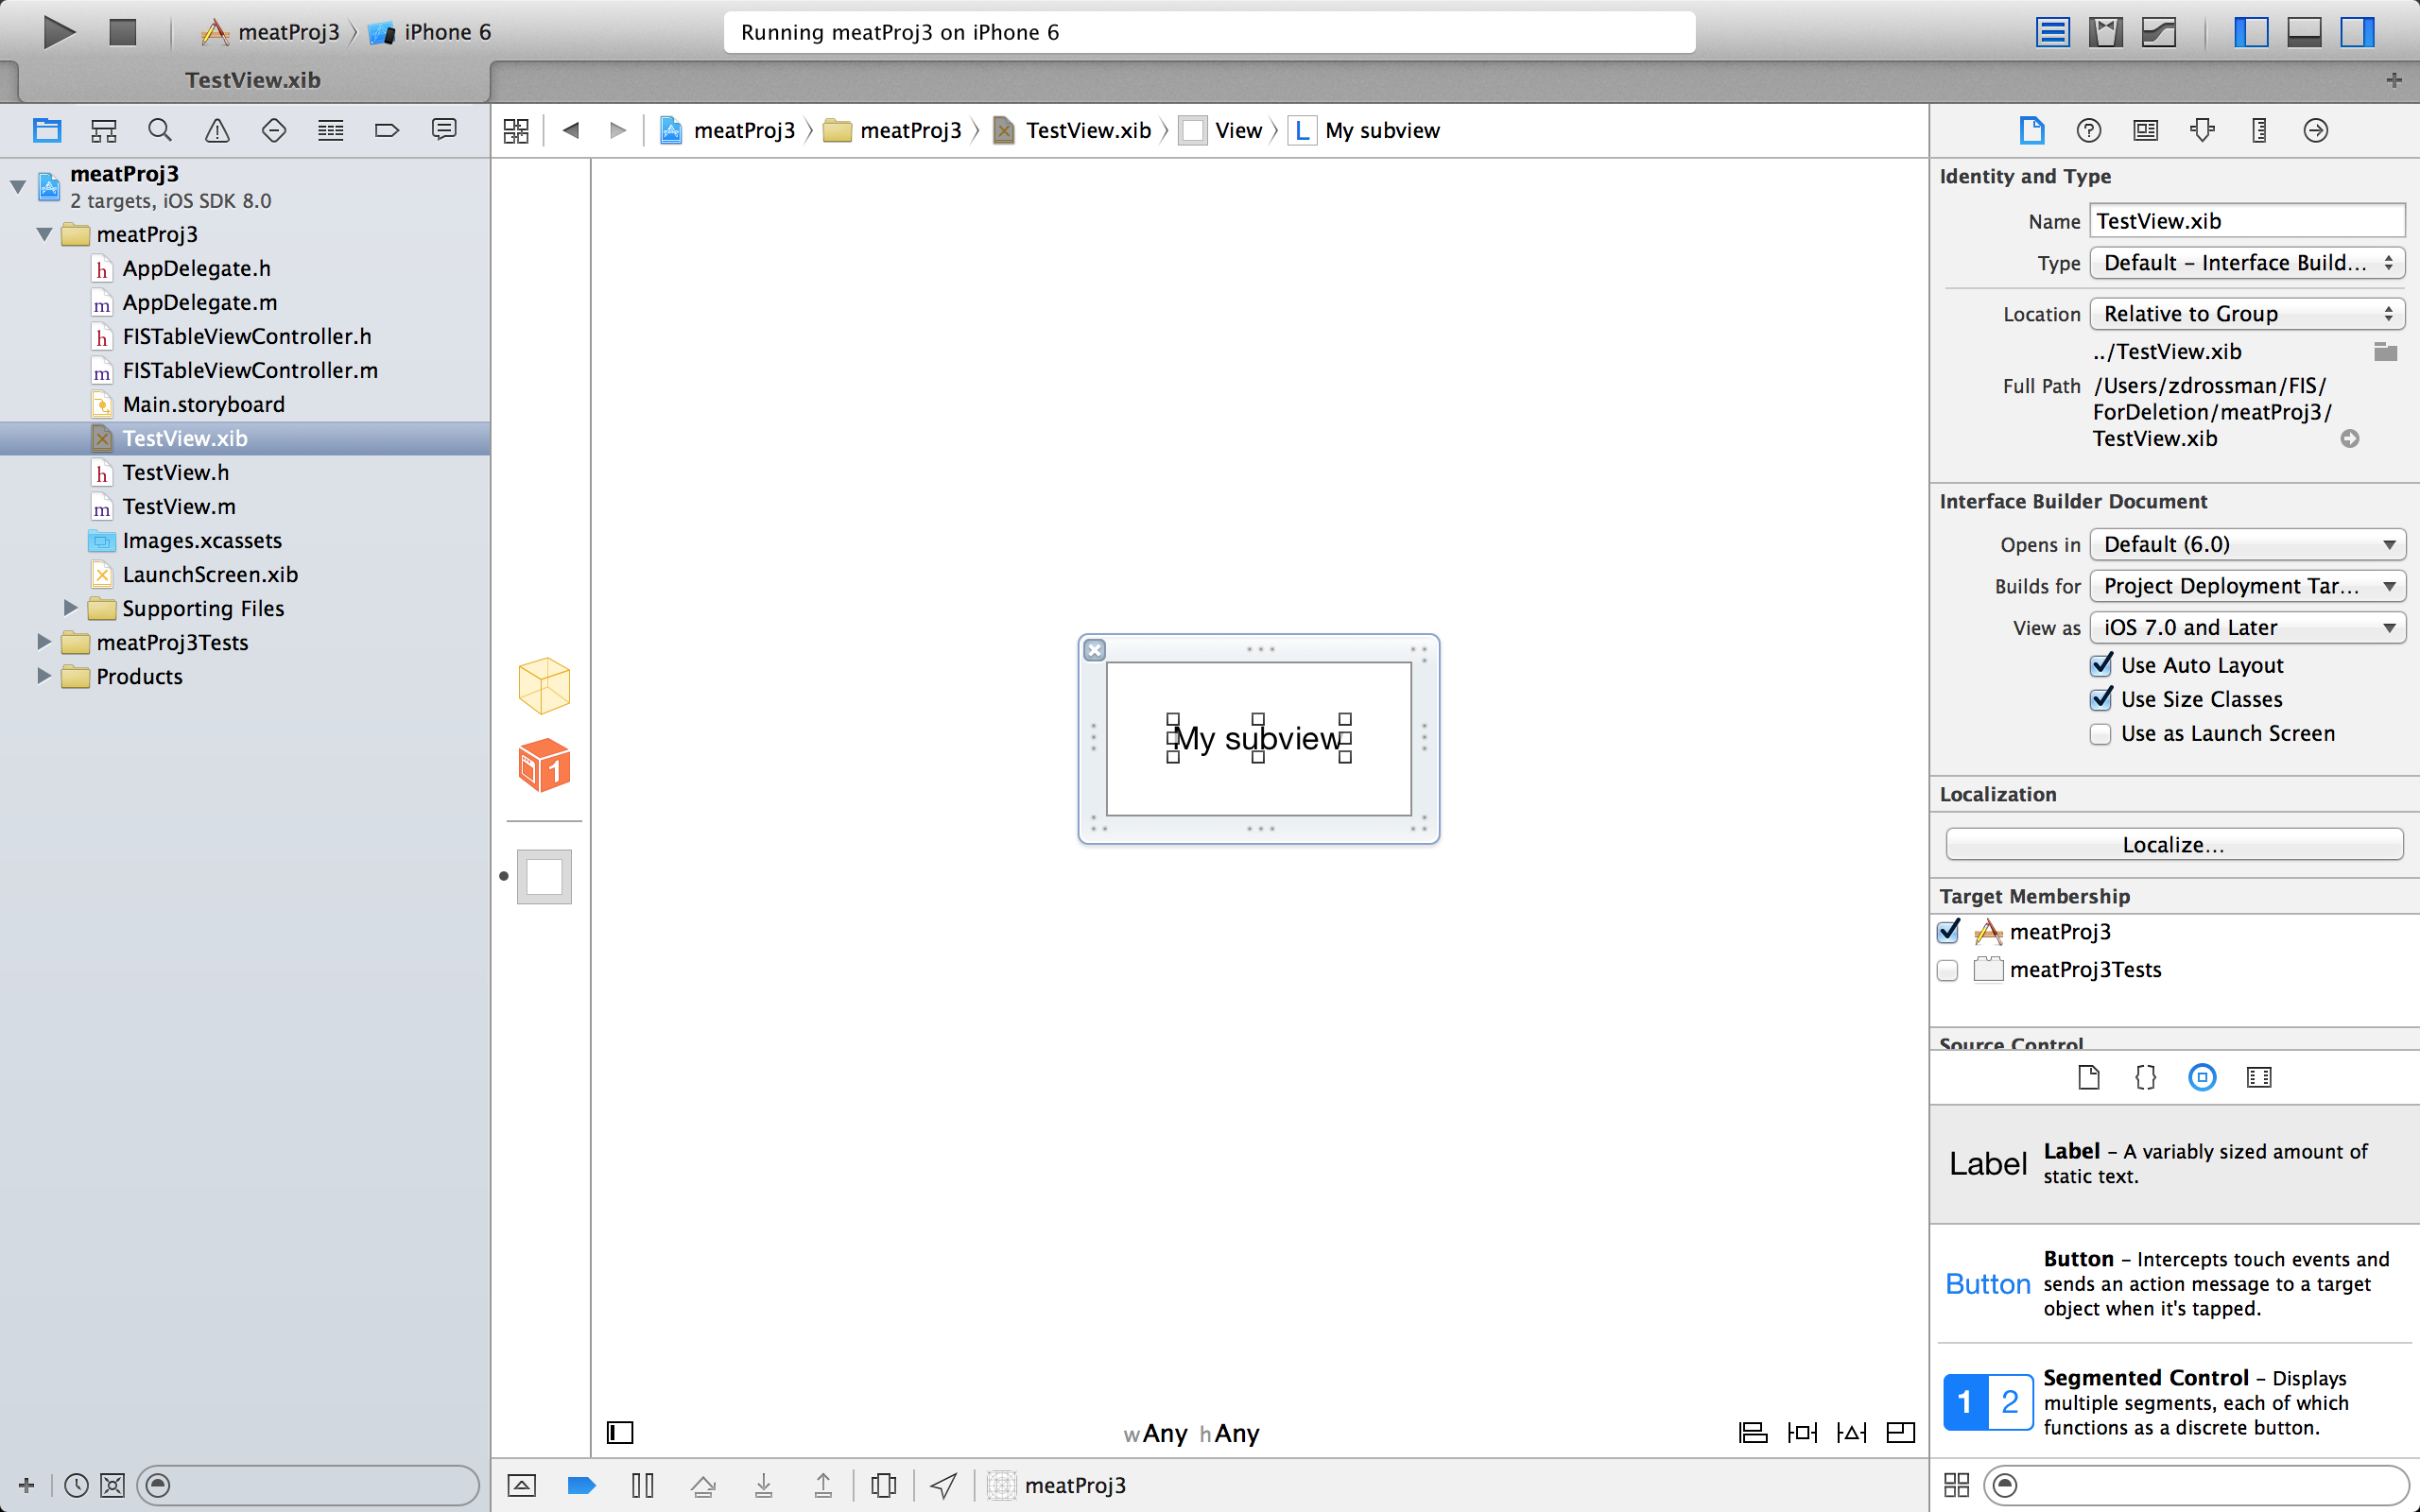
Setup outlets from the xib to the class associated with the xib
Next, drag both the UIView and the UILabel objects from the xib canvas to the associated .h file of the class. You will need to be in “Assistant Editor” mode to do this (to see both on screen at the same time.) In case you have not previously done this with a Storyboard, or as a refresher, you will need to hold down the CTRL key when you drag. You will see the line from the object to the class. Let go when you your cursor is between the @interface and @end section of the file.
You will be adding outlets which is the default. Your UIView may be called view and your UILabel may be called label as we have shown here.
Setup initWithCoder in the class associated with your xib
In most of our code, when we initialize a view, we use the initWithFrame (or plain init) method as a default or designated initializer. However, when initializing a UIView from a storyboard, we use initWithCoder:. It is this method that will be called when the Storyboard goes to load the UIView.
1 2 3 4 5 6 7 8 9 10 11 12 13 14 15 | |
We have added some code to this method as well. The loadNibNamed: method call is where the magic happens that loads the xib, instead of seeking out the interface in code alone.
Note: The class associated with the xib file should be a subclass of UIView, and generally not UIViewController. Note the line of code that adds our view object to the xib. This may not seem entirely intuitive at first, but make sure you do add the view object as a subview of the view class.
Subclass the File’s Owner
Now this is an important step and one that I’ve seen many folks forget (me, for one, to include in this post originally!) or do incorrectly. We need to tell Xcode the appropriate class for the File’s Owner. So in your right hand pane, make sure you add your custom class name to the Custom Class field in the Identity Inspector. Make sure the File’s Owner is selected when you do this. You’ll see the File’s Owner represented by a transparent yellow box at the top of the Document Outline.
Often, I’ve seen folks attempt to set the View as a subclass of it’s associated class using the same method I describe above. Do not make this mistake. You’ll end up in an infinite loop.
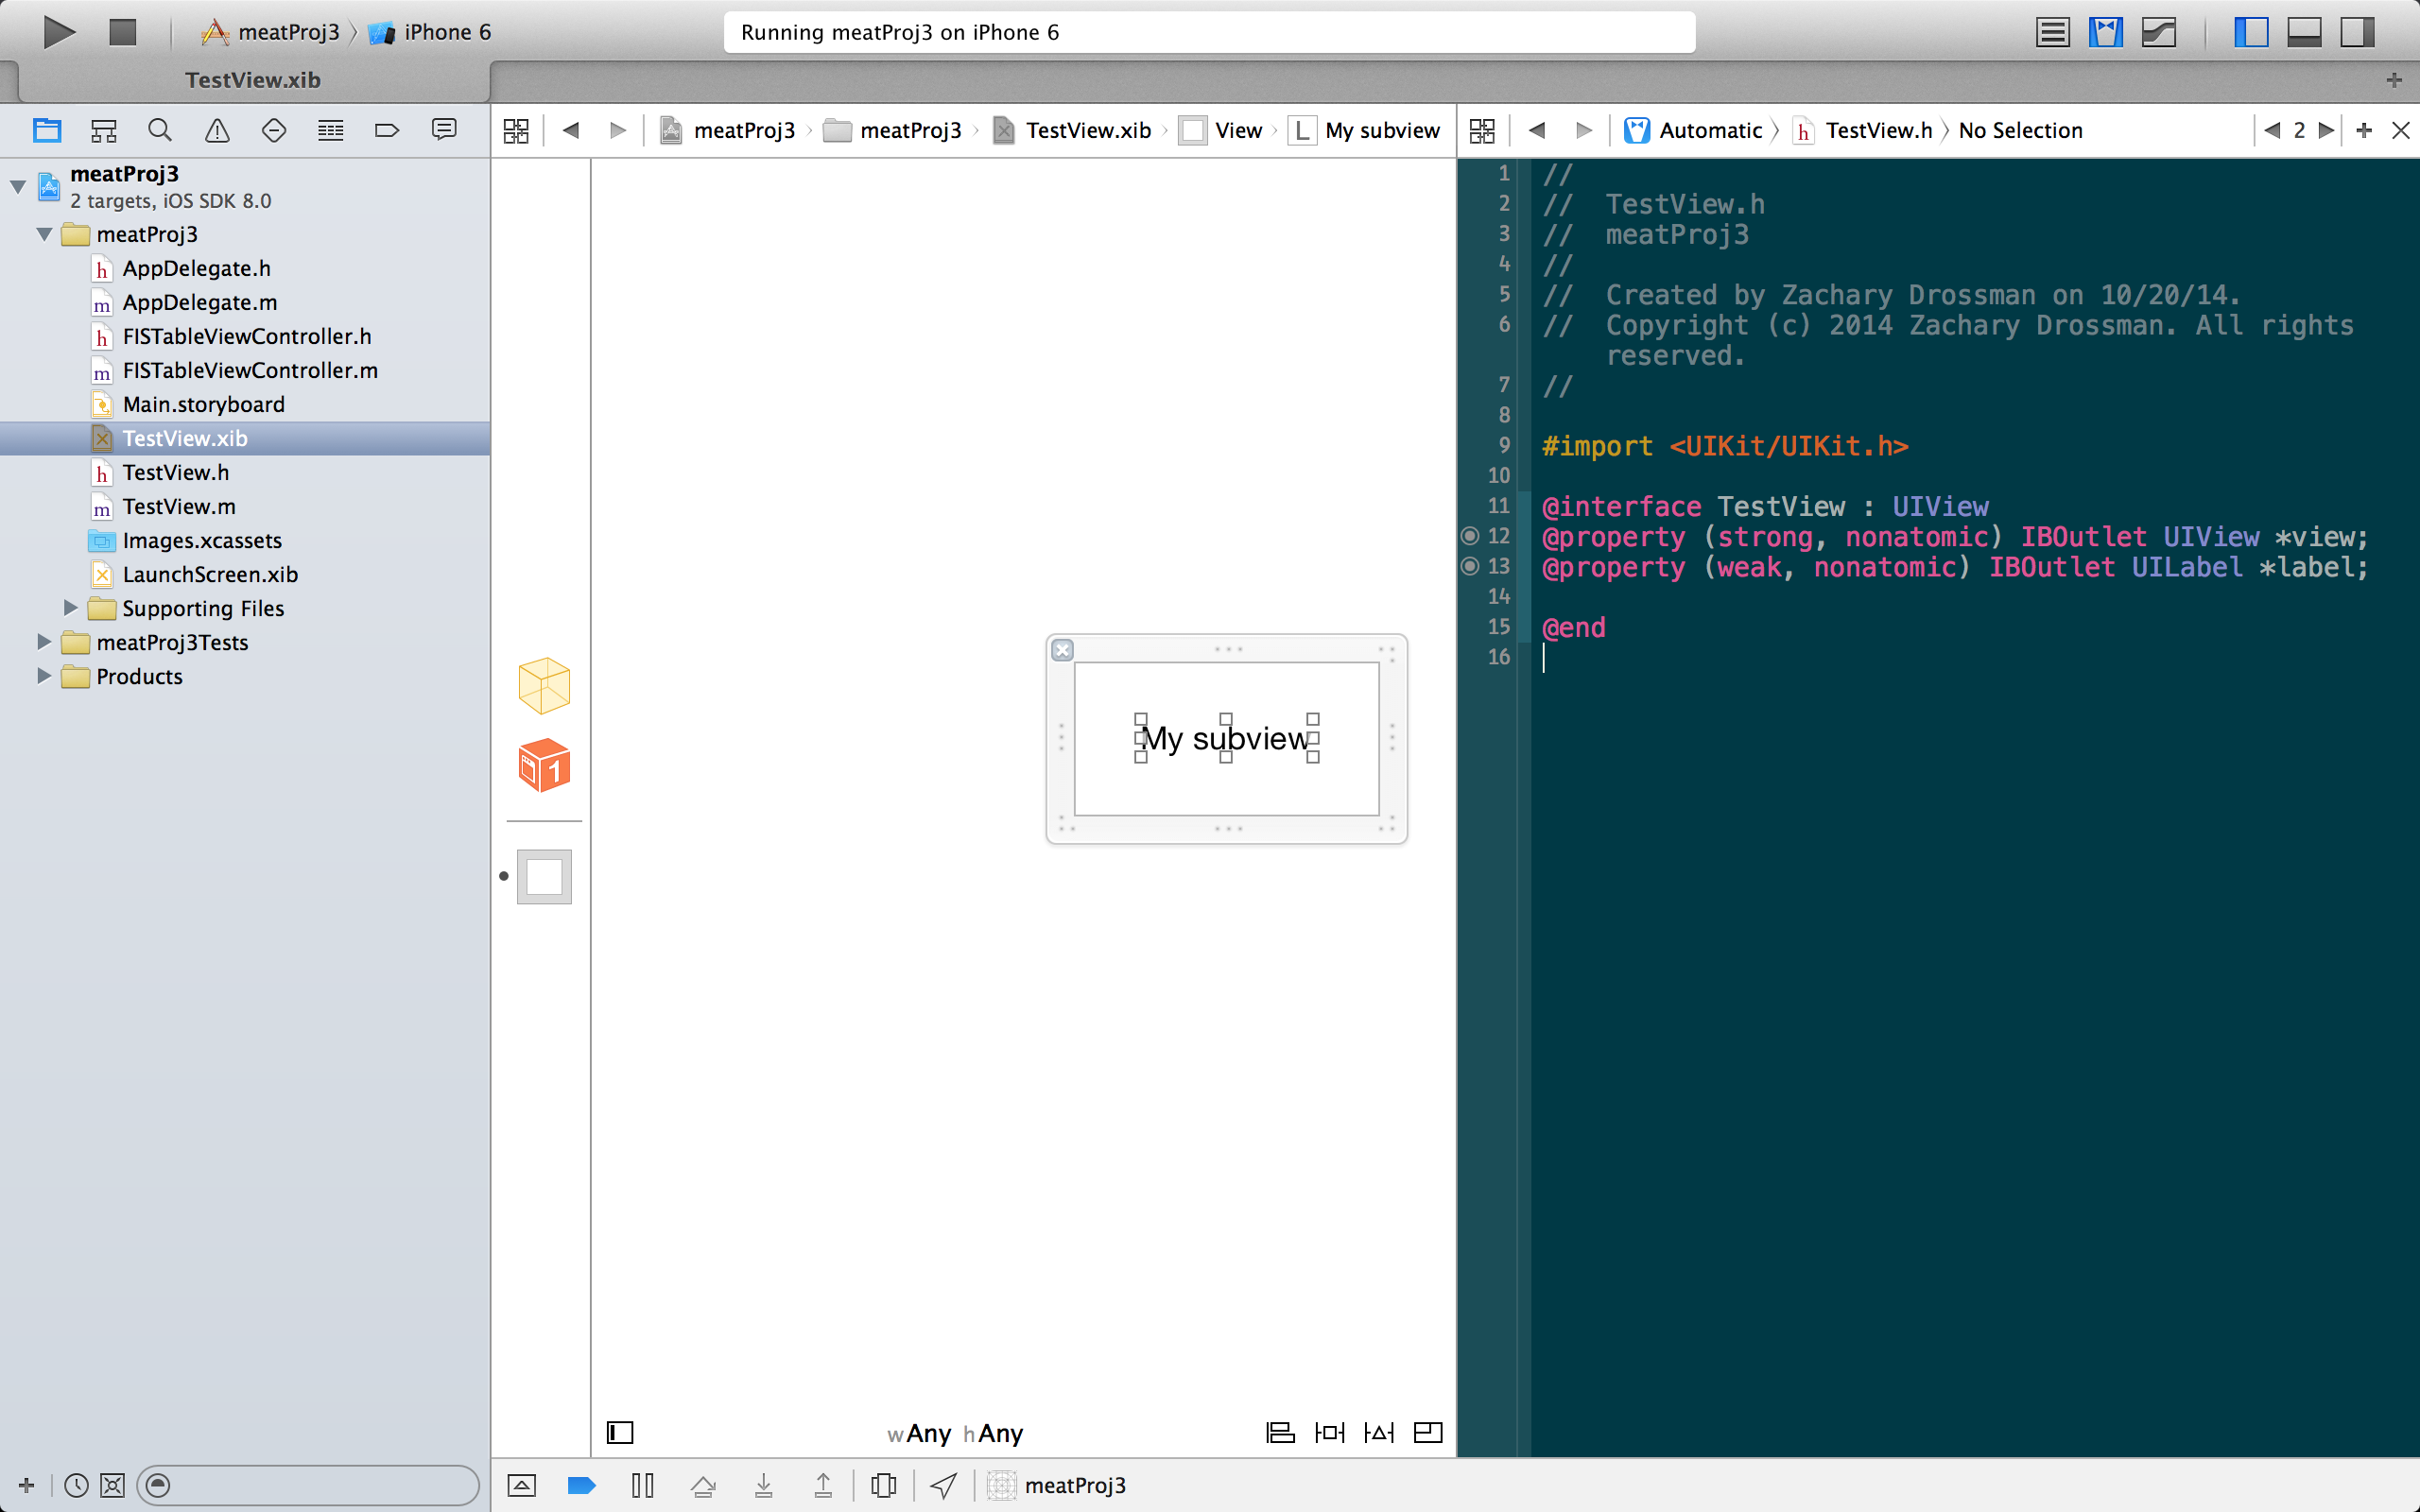
Add your custom view to a storyboard view
Head over to the storyboard and add a UIView object. Resize the object to be the same size as the xib frame. (At least for sanity’s sake. Keep in mind that if you are actually using xibs to skin entire view controllers, the size will be determined by the view controller’s size when you are using autolayout.)
I’ve added my subview a couple of times to a UITableViewCell in a UITableViewController.
Now subclass your UIView to be the same as the class you want to show up.
And voila!
You should now be able to run your program and see your beautiful xibs pop up on screen as expected!